


How to Install and Configure WordPress
Updated by Elle Krout Written by Linode
DeprecatedThis guide has been deprecated and is no longer being maintained.Please refer to the updated version of this guide.
WordPress is a popular, dynamic, blog-focused content management system. The software is built upon a LAMP or LEMP stack and features an extensive plugin framework and theme system, which allows site owners and developers to deploy easy-to-use and powerful publishing tools.
If you’re using Ubuntu 16.04, please use our guide on how to Install WordPress on Ubuntu 16.04.
NoteThis guide is written for a non-root user. Commands that require elevated privileges are prefixed withsudo. If you’re not familiar with thesudocommand, you can check our Users and Groups guide.
Before You Begin
Ensure that you have followed the Getting Started and Securing Your Server guides, and that the Linode’s hostname is set.
To check your hostname run:
hostname
hostname -f
The first command will output your short hostname; the second, your fully-qualified domain name (FQDN).
You have a configured web stack set up. This can be a LAMP or LEMP stack.
MySQL has a database set up for WordPress. If you do not have a database, create it:
Enter the MySQL command line:
mysql -u root -pCreate a WordPress database:
create database wordpress;Create and grant a user privileges for the newly-created
wordpressdatabase, replacinguserandpasswordwith the username and password you wish to use:grant all on wordpress.* to 'user' identified by 'password';Exit MySQL:
quit
Install WordPress
Create an
srcdirectory under your website’s directory to store pristine copies of WordPress’s source files. In this guide, the home directory/var/www/example.com/is used as an example. Navigate to that new directory:sudo mkdir /var/www/html/example.com/src/ cd /var/www/html/example.com/src/Set the owner of the new directory to be your web server’s user. In this instance, our web server is Apache:
sudo chown -R www-data:www-data /var/www/Install the latest version of WordPress and expand it:
sudo wget http://wordpress.org/latest.tar.gz
sudo tar -xvf latest.tar.gz
Move
latest.tar.gz, so it is renamed aswordpress, followed by the date to store a pristine backup of the source files:sudo mv latest.tar.gz wordpress-`date "+%Y-%m-%d"`.tar.gzMove the WordPress files to your
public_htmlfolder:sudo mv wordpress/* ../public_html/
Configure WordPress
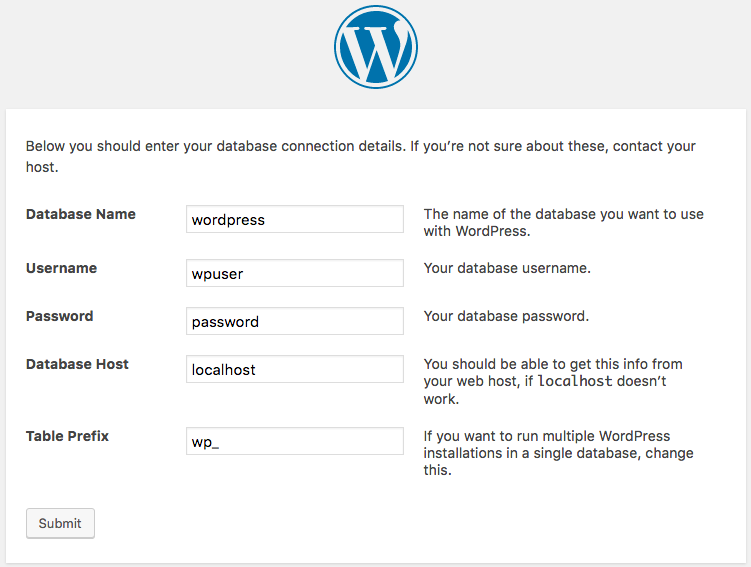
Visit your domain in your web browser and follow the steps outlined by the configuration process. Begin by reviewing the informational page and clicking the “Let’s go!” button. Supply WordPress with the database credentials established when you installed the database server. Finally, select “Run the install” and supply the required values as prompted:
As it stands, should you try to update WordPress or install new themes or plugins, you will be asked to input your FTP information. To bypass this, you must alter your
wp-config.phpfile by adding the following line:- /var/www/html/example.com/public_html/wp-config.php
-
1
2
/** Bypass FTP */ define('FS_METHOD', 'direct');
Next, give WordPress permission to add and edit files in the
public_htmlfolder:sudo chown -R www-data:www-data /var/www/html/example.com/public_htmlIf using Apache, issue the following commands to ensure that
mod_rewriteis enabled:sudo a2enmod rewriteRestart Apache.
Note
If using permalinks to set your posts’ URLs, Apache will need to be updated to allow individual sites to update the
.htaccessfile. To permit this, add the following to you WordPress website’s VirtualHosts code block:-
1
2
3
4
5
<Directory /var/www/> Options Indexes FollowSymLinks AllowOverride All Require all granted </Directory>
You will now be able to login to your new WordPress-powered website. You can continue the configuration of your WordPress site from the web-based interface.
Congratulations! You have now successfully installed WordPress.
-

More Information
You may wish to consult the following resources for additional information on this topic. While these are provided in the hope that they will be useful, please note that we cannot vouch for the accuracy or timeliness of externally hosted materials.
Join our Community
Find answers, ask questions, and help others.
This guide is published under a CC BY-ND 4.0 license.